Greenfingers

Cake fit for a landscape gardener. The first cake I've timed perfectly! I wasn't rushed for any part of it, I didn't stay up late to finish it, and I didn't have to sacrifice any of the detail I wanted to finish on time. Perhaps I'm getting the hang of this? - or maybe I've come to terms with how slow I am!


This is my second attempt at a standing figure. Still room for improvement but I keep watching Artisan Cake Company's tutorial in the hope mine will look just as good one day.


My first wheelbarrow! My own creation as I couldn't find a tutorial for a wheelbarrow. I moulded it around a matchstick box wrapped in cling film, and inserted wire for the handles - the only non-edible part of the cake.


The reaction from Kirsty and Matt when they came to collect it was brilliant and a real confidence boost. They had sent me a picture of a cake they liked, which I kinda followed, but I don't think they were expecting all of the added little details.


I really enjoyed making this one and it was nice to catch up with old friends/colleagues again.

2 comments:

Chocolate Cake with Vanilla Meringue Frosting


If you enjoy baking and you don't already own one of the Hummingbird Bakery books, I seriously recommend you get one. I've tried many of their recipes and they never fail to satisfy my taste buds.

This one is a dressed up chocolate cake. It's filled and covered with vanilla meringue frosting and topped with a marbled chocolate disc. It's not your usual chocolate sponge as the ingredients include melted dark chocolate and sour cream. It's a little bit on the heavy side so a small slice goes a long way.


I should have used more frosting in-between the layers, and if I'd left it in the fridge maybe the inside wouldn't look so sloppy - still, who cares if it tastes good!


Yum!

0 comments:

Carousel Christening Cake

Given free reign on my nieces Christening cake and this was the result. It's a little sloppy in places but I won't highlight where ;)


I took a short cut with the middle tier and removed some of the stress by using a dummy cake. It didn't need to be cake anyway as the top and bottom would give enough servings.


The horses are made using a silicon mould from The Cake Decorating Company. It's an expensive mould (it's even gone up quite a bit since I bought it) but the detail is brilliant. Also it's for my niece so no expense spared!

I probably made around 15 horses but only managed to release 6 successfully. It's quite easy to mangle legs or ears while you're concentrating on releasing another part. I guess patience is a virtue.


I dusted the mould with pearl lustre dust to help release the fondant and give the horses a little shimmer. I used a plastic dowel to make a hole through the centre of the body and once they were dry I painted their features with food colouring. The plastic dowels were wrapped in fondant and used as the horse's pole. 


Originally I had an entirely different design in mind for the carousel but some of the moulds I ordered didn't arrive on time, hence the top looks a little unfinished.... better planning required on my part :/

Finally, for Aunty Elaine who complimented my piping skills with regards to the lettering... tappits! My handwriting is bad in pen let alone icing. There are lots of fonts available and I use them the Krazy Kool Cakes way. Secret shared ;)

0 comments:

Grasshopper Pie


This dessert takes me back to my days as a waitress, maybe one of the best jobs I've ever had though I didn't realise it at the time.

I worked as a waitress after I finished uni. I had no desires to stay a waitress but I can really appreciate that job now; no stress, work didn't come home with me, everyone pitched in and we had a good laugh. I suppose it helped that I had no mortgage and no responsibilities too :)


Anyway, Grasshopper pie was my favourite dessert and I always hoped to find a damaged slice in the box. We couldn't serve it to customers if it wasn't presentable and we'd have to "dispose" of it ;) At least that's what I was told and I had no reason to question it.

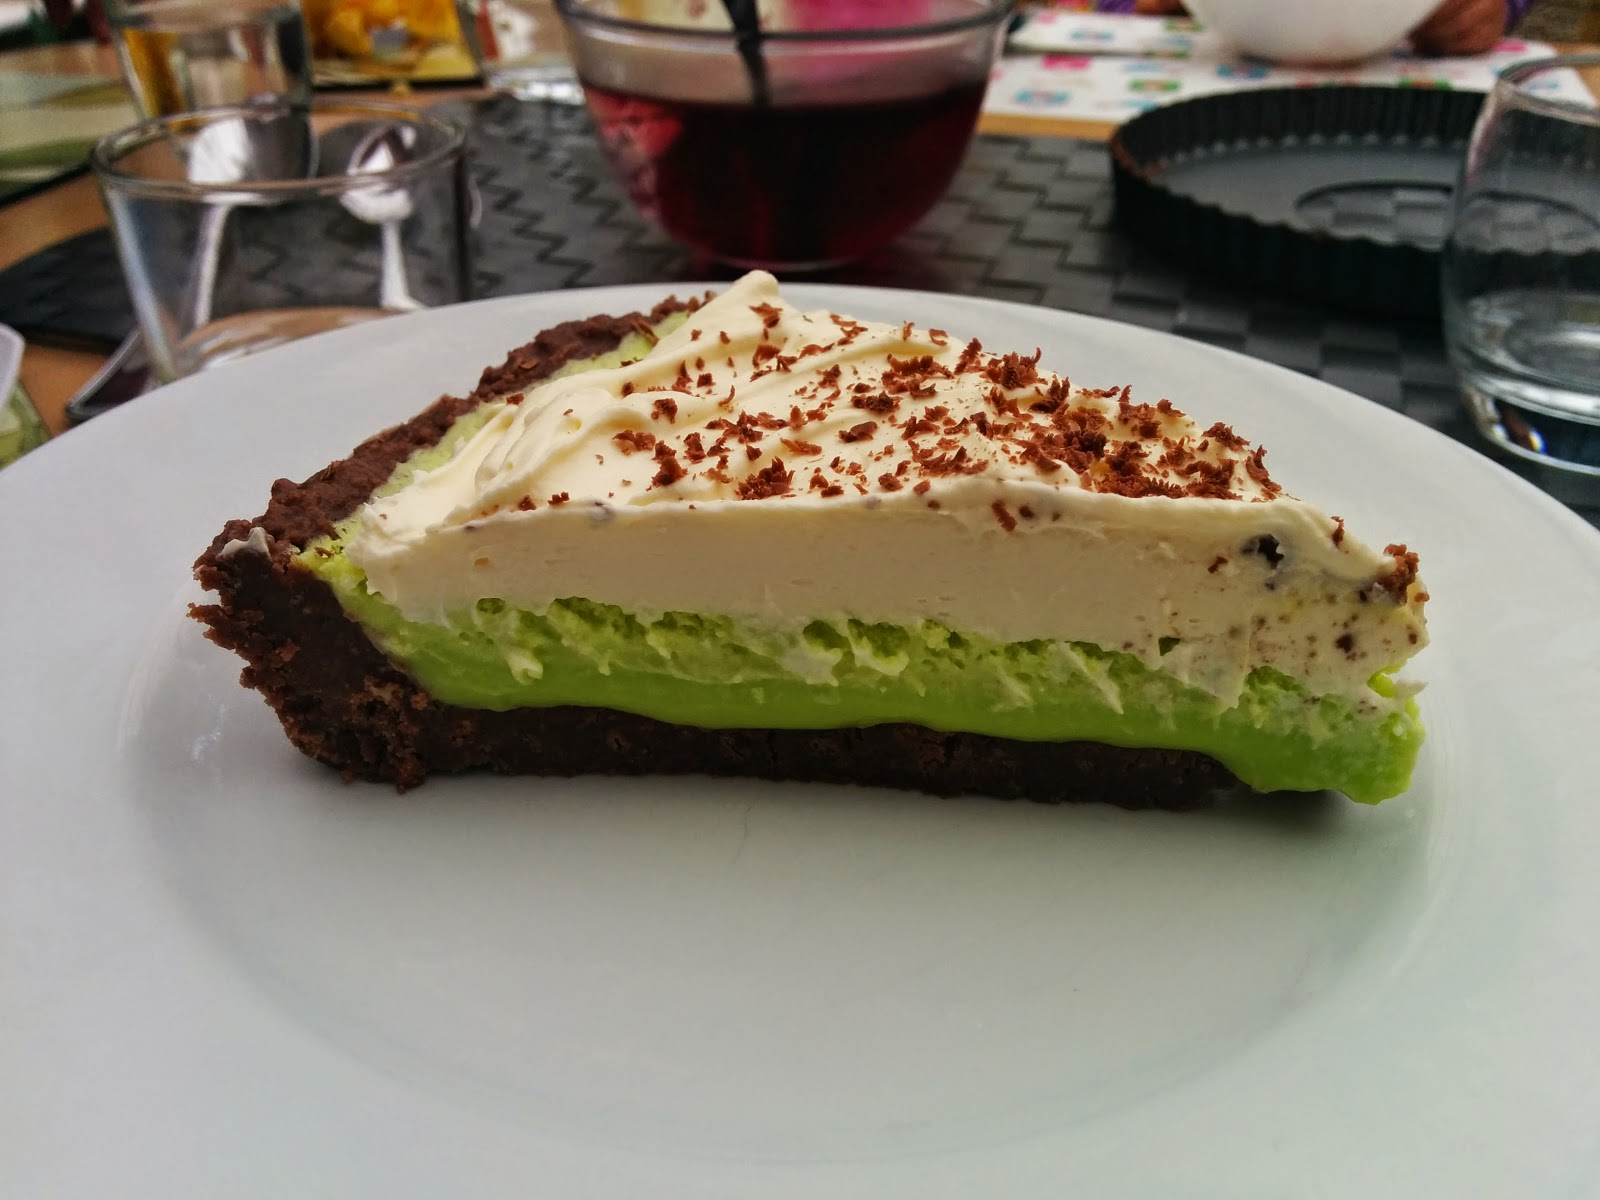
Grasshopper pie has a sweet biscuit base (this one was made with double chocolate chip cookies) and a minty mousse filling. I'm not sure why it's called grasshopper pie, I think it's named after a cocktail or maybe it's just because the filling is coloured green. Mine may be a little too green. It should be mint green but I only had electric green to hand.


This is actually half the size of the one I used to serve and its topped with cream instead of chocolate. It's a very naughty dessert but very easy to make as it only needs chilling, no baking.

Despite all its naughty ingredients it's a light, refreshing pie and you know it's good when it gets the Conster's approval!


0 comments:

Chocolate Truffle Cookies

Those of you that know me know I have no self control when it comes to biscuits. The only way I can manage my addiction is to simply not buy them, however some days biscuits are a necessity. The good thing about our kitchen is it's always well stocked with baking ingredients to make my own.

So flicking through my recipe books looking for a quick fix, these Chocolate Truffle Cookies were the obvious choice, a. they're chocolate, b. they have a splash of Amaretto in them (also always well stocked in our house).

I had to be patient while the dough chilled but while I was waiting I could run up and down the stairs a few times to make me feel better about my imminent biscuit binge. 

I said could... I didn't, but I did snap a picture of Mr Prickles who couldn't wait until nightfall for his fix of meal worms.

My patience ran out as soon as they were baked and I could smell them. I ate them while they were still warm and they were gone in record time, Chris was lucky to get a couple! I have no regrets.

I've made a few more batches since then, to accompany a cuppa with friends and as a small birthday treat for my Nan who shares my sweet tooth.

I think they make a nice gift in a pretty jar with a little ribbon tied round.

0 comments:

A Vintage Christening

Most of my cakes are for friends and family but when a friend volunteered my services I decided to have more confidence in my skills and say yes. I get super nervous making cakes for people outside of friends and family but I figure it's good to step outside your comfort zone every once in a while.

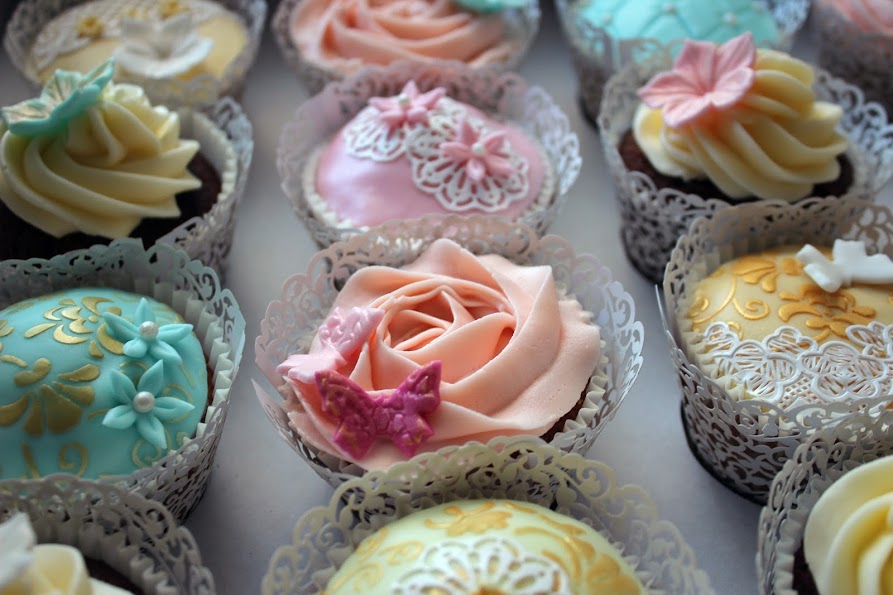
The request was for cupcakes to fit in with a vintage tea party theme for a little girls Christening day. The theme was right up my alley and perfect for all my stencils and lace mats... and an excuse to buy more :)

To accompany the cupcakes was an understated but beautiful cake. 

With all of the cupcakes, the cake only needed a little decoration but I still wanted it to stand out. I decided to keep it plain and add one extravagant sugar flower to the top.

As luck would have it, a tutorial to create an open peony from  'Happy Cakes by Renee' popped up on my facebook feed that week. A brilliant tutorial; I was expecting to need a few attempts at it but I was so happy with how my first one turned out, that is the one you see on the cake.


It's always tricky fitting cakes in around work but nevertheless, I really enjoyed making these and I was so glad they were pleased with them. 

Thank you Melissa for your kind words and thank you to my friends and family also. Your compliments and support encourage me to take on new baking challenges and give me that little confidence boost I need.

0 comments:

3D Basketball Cake

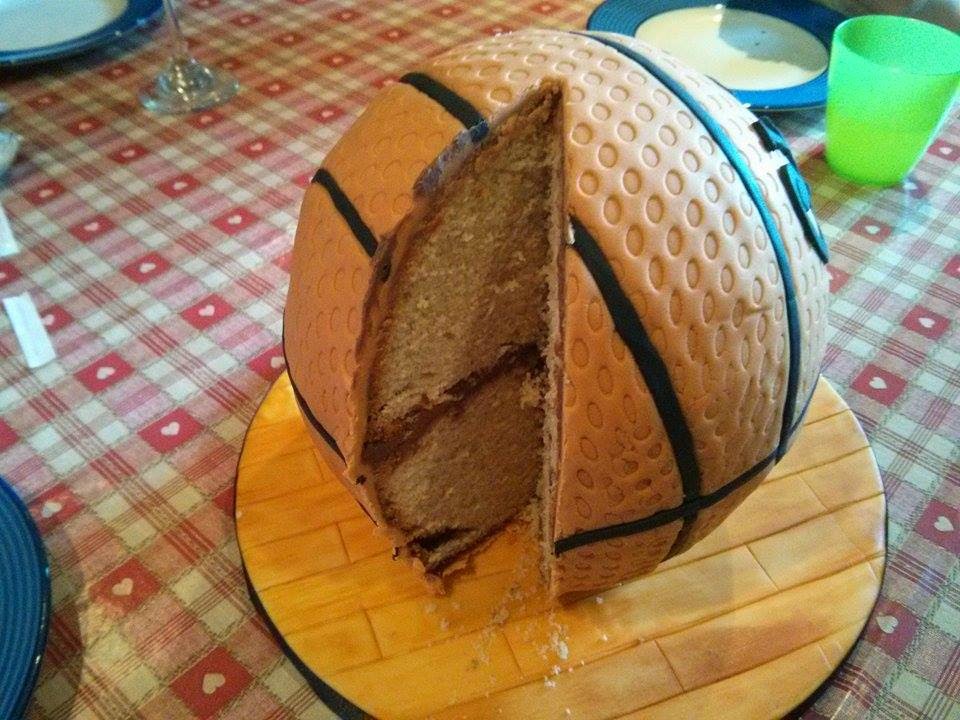
Mr Chris is very much in to NBA Basketball at the moment and requested a basketball cake for his birthday. What he actually asked for was half a basketball because in his words, "he didn't want a cake that falls apart" - he was referring to the great cake disaster of 2012.

I have to restore his faith in my cakes so I took another sneaky day off work, (you would think he'd have caught on to this by now) and with my lessons learnt tackled another ball cake.

This time I did not ignore advice from the experts and read all of the information for ball cakes on Lindy's blog.

Instead of a soft sponge cake, I baked a madeira cake following Jane's "Baking the Perfect Madeira" post, again on Lindy's blog. I also allowed plenty of time for it to cool, baking the cake the evening before and leaving it overnight. 

When the cake came out of the oven, I knew it was going to be more successful then last time.


Covering a ball cake with fondant is a little tricky. The idea is to lay the fondant over the cake and form the excess in to two or more pleats around it. The pleats are then cut away and the joins are closed and smoothed out. 

On this cake it was much harder because I'd created an impression in the fondant (using one of Chris' Lego mats :) ) and I didn't want to loose it. I worked slowly and carefully and for the most part the impression stayed, there were a few spots where it rubbed out but they were near to the bottom so not overly noticeable. 

I had hoped to add some more finishing touches but ran out of time as Mr Chris finished work a little earlier then usual.

He was suitability impressed and he approved of the filling too. I added almond extract and ground almonds to the madeira recipe and used chocolate amaretto buttercream for the filling - I think this could be my new favourite.

The lesson this time... "If at first you don't succeed, try try again".

0 comments:

Home-made Battenberg Cake

I should have taken some progress pictures but I didn't expect this to turn out so well on my first attempt.


This was created following a Mary Berry recipe from her book "Mary Berry's Baking Bible". It was surprisingly straight forward so if you like battenberg and you have the book I urge you to give it a go. I will definitely make it again so I'll get more pictures next time.

0 comments:

Lissie's First Cake

The very first cake for my little niece Lissie and it was no where near as perfect as she is. 


I know she can't appreciate it yet but I loved every minute making this and I look forward to creating so many more cakes for her. I also look forward to lots and lots of cuddles!!!

0 comments:

Effie's Cake

A cake to congratulate our friends Ad and Iona on the birth of their beautiful daughter Effie Ksenija.


The elephant's little balloon and the bunting are my favourite parts of this cake. Mr Chris said my little bows were so good he thought I'd bought them or used a mould to make them.


I had planned to make a more realistic elephant but I thought this little fella was so simple and cute he was perfect for a baby cake.


0 comments:

Zingy Lemon Cake

Using my sister's birthday as an opportunity to experiment with flavours.

I know my sister likes lemon curd so I baked a lemon sponge, filled it with lemon curd, and covered it with lemon flavoured buttercream.


The flavour was good but I'm still trying to perfect a flawless finish with my buttercream icing. Also, I would avoiding using these silver dragees as they were far too hard to eat.

0 comments:

Blogger Template by Clairvo